
Louvre roof planning in NZ is one of those projects where the decisions you make early determine how much you'll actually love the finished product.
Most people in NZ start to plan a louvre roof by scrolling through inspiration images. That's fine, but it can lead you straight to the wrong product for your site, your home's architecture, or the way you actually want to use the space. And once the structure is built, changing your mind gets expensive fast.
Keep reading to see the planning process in the right order. By the end of our louvre roof design guide, you'll be in a much stronger position to get a result that works for your home and climate.
At a Glance:
- Start with how you use the space: As a morning coffee spot or an evening entertaining area? Every day use or occasional gatherings? Your lifestyle should shape the design, not the other way around.
- Read your site before anything else: Sun path, wind exposure, and aspect vary significantly across NZ. These conditions affect how your roof needs to be engineered and oriented.
- Choose your configuration early: Wall-fixed or freestanding? This decision affects your consent requirements, your build timeline, and the structure's relationship to your home.
- Work through the design details in order: Height, blade orientation, colour, and controls all influence each other. Getting these right takes a conversation, not a catalogue browse.
- Visualise it on your actual home: Try out our virtual viewer to visualise a louvre roof on your home.
- Understand your consent obligations: Rules vary by council and site. Know your thresholds before you finalise dimensions.
Start with How You Use Your Outdoor Space
Good open roof planning starts with you, not the product. So, before you call anyone or request a quote, take some time to think about how you currently use your outdoor space and how you want to use it. This is the foundation of any successful attempt to design an outdoor space in NZ.
Ask yourself these questions:
- When are you out there?
A north-facing deck that gets full sun from 10 am requires a completely different opening roof design consideration from a sheltered courtyard you retreat to in the evening. The orientation of your blades, the height of the structure, and whether you need shade or shelter (or both) all shift depending on your answer.
- Who's using the space?
A young family needs something different from a couple who entertain regularly or a homeowner who wants a quiet spot to work outside. If the space serves multiple purposes across different times of day, that's worth knowing before the design is locked in.
- How often will you actually use it?
A space you use daily warrants greater investment in comfort features such as motorisation, integrated lighting, or side screens. A space you open up a few times a year for larger gatherings has different priorities.
- What's sending you back inside right now?
Too much sun in the afternoon? Rain that arrives without warning? Wind that makes the space uncomfortable before you've finished your first drink? The answer to that question often points directly to the features that will matter most in your finished roof.
The clearer you are about how you want the space to feel and function, the easier it is to design an outdoor space in NZ that delivers that.
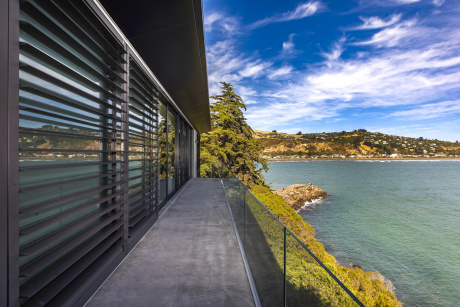
How Site Conditions Shape Your Louvre Roof Design
NZ's climate is more variable than most people account for when planning a louvre roof. Wind exposure, rainfall intensity, UV levels, and the direction your section faces can all differ significantly, even between neighbouring properties.
A louvre roof that's perfectly suited to a sheltered suburban section in Christchurch needs to be specified very differently from one on a north-facing coastal site in the Coromandel or an exposed hillside in Wellington.
Sun Path and Aspect
In New Zealand, north-facing outdoor spaces receive the most sun across the day. But the angle and intensity shift considerably between summer and winter, and between morning and afternoon.
Before you finalise the size and position of your roof, spend time in the space at different points of the day (and ideally, at different times of the year). Identifying where heat builds up and where shadows fall in the late afternoon is an essential consideration in opening roof design that directly influences how your blades should be oriented and how much coverage you need.
Wind Exposure
New Zealand has a formal wind zone classification system under AS/NZS 1170, and the zone your site falls into determines the structural specification required for your louvre roof.
A roof engineered for a low wind zone won't perform the same way on a high-exposure site. If your section is elevated, coastal, or in a known high-wind corridor, flag that early. Understanding your wind conditions shapes which system is right for your site and is a key part of how to choose a louvre roof that will perform over the long term.
Rain and Drainage
When your louvre blades close, water is channelled into an integrated drainage system. But how that water is managed depends on the pitch, the fall, and where the downpipes connect.
If you're adding a louvre roof to an existing deck or patio, understanding how drainage will connect to your existing system is something to sort out at the planning stage, not once the frame is up.
Wall-Fixed, Freestanding, or Something in Between?
Once you've got a feel for how you want to use the space and what your site is working with, the next decision is how the structure itself sits on your property.
Wall-Fixed
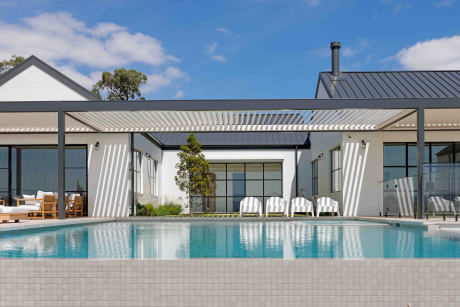
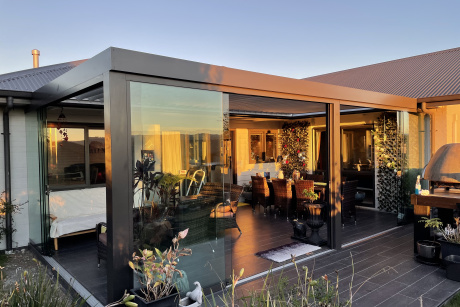
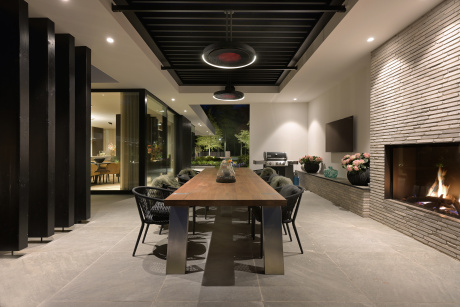
A wall-fixed louvre roof attaches directly to the house, with one edge of the structure fastened to an exterior wall. This is the most common configuration for covered decks and alfresco areas, and it works well when you want the outdoor space to feel like a natural extension of the interior. The roof extends the ceiling plane outward, strengthening the connection between inside and outside without requiring a fully enclosed addition.
The practical consideration here is your existing wall. Before a louvre system can be fixed to it, the wall needs to be assessed to confirm it can handle the additional load.
Freestanding
A freestanding structure stands independently of the house, supported on its own posts. This suits spaces that are set away from the main building, such as a poolside area, a paved courtyard further into the garden, or a section where the deck layout doesn't lend itself to a wall connection.
Because the structure isn't tied to the house, you're not constrained by the existing wall height or roofline, giving you greater flexibility in size and positioning.
The In-Between Option
Some projects call for something that doesn't fit neatly into either category. For example, a roof that connects to the house on one side but is freestanding on the other, or a structure that spans between two existing walls. These hybrid configurations are more common than you might think, particularly on older homes where the outdoor area has an irregular shape or where the architecture makes a standard wall-fix difficult.
If your project is complex, raise it early. Bringing your dealer into the conversation at the design stage means any structural or consenting implications can be worked through before they become constraints.
This is especially true if you're thinking about a louvre roof before building work begins on a new home or addition, where configuration decisions can be designed in from the start rather than worked around later.
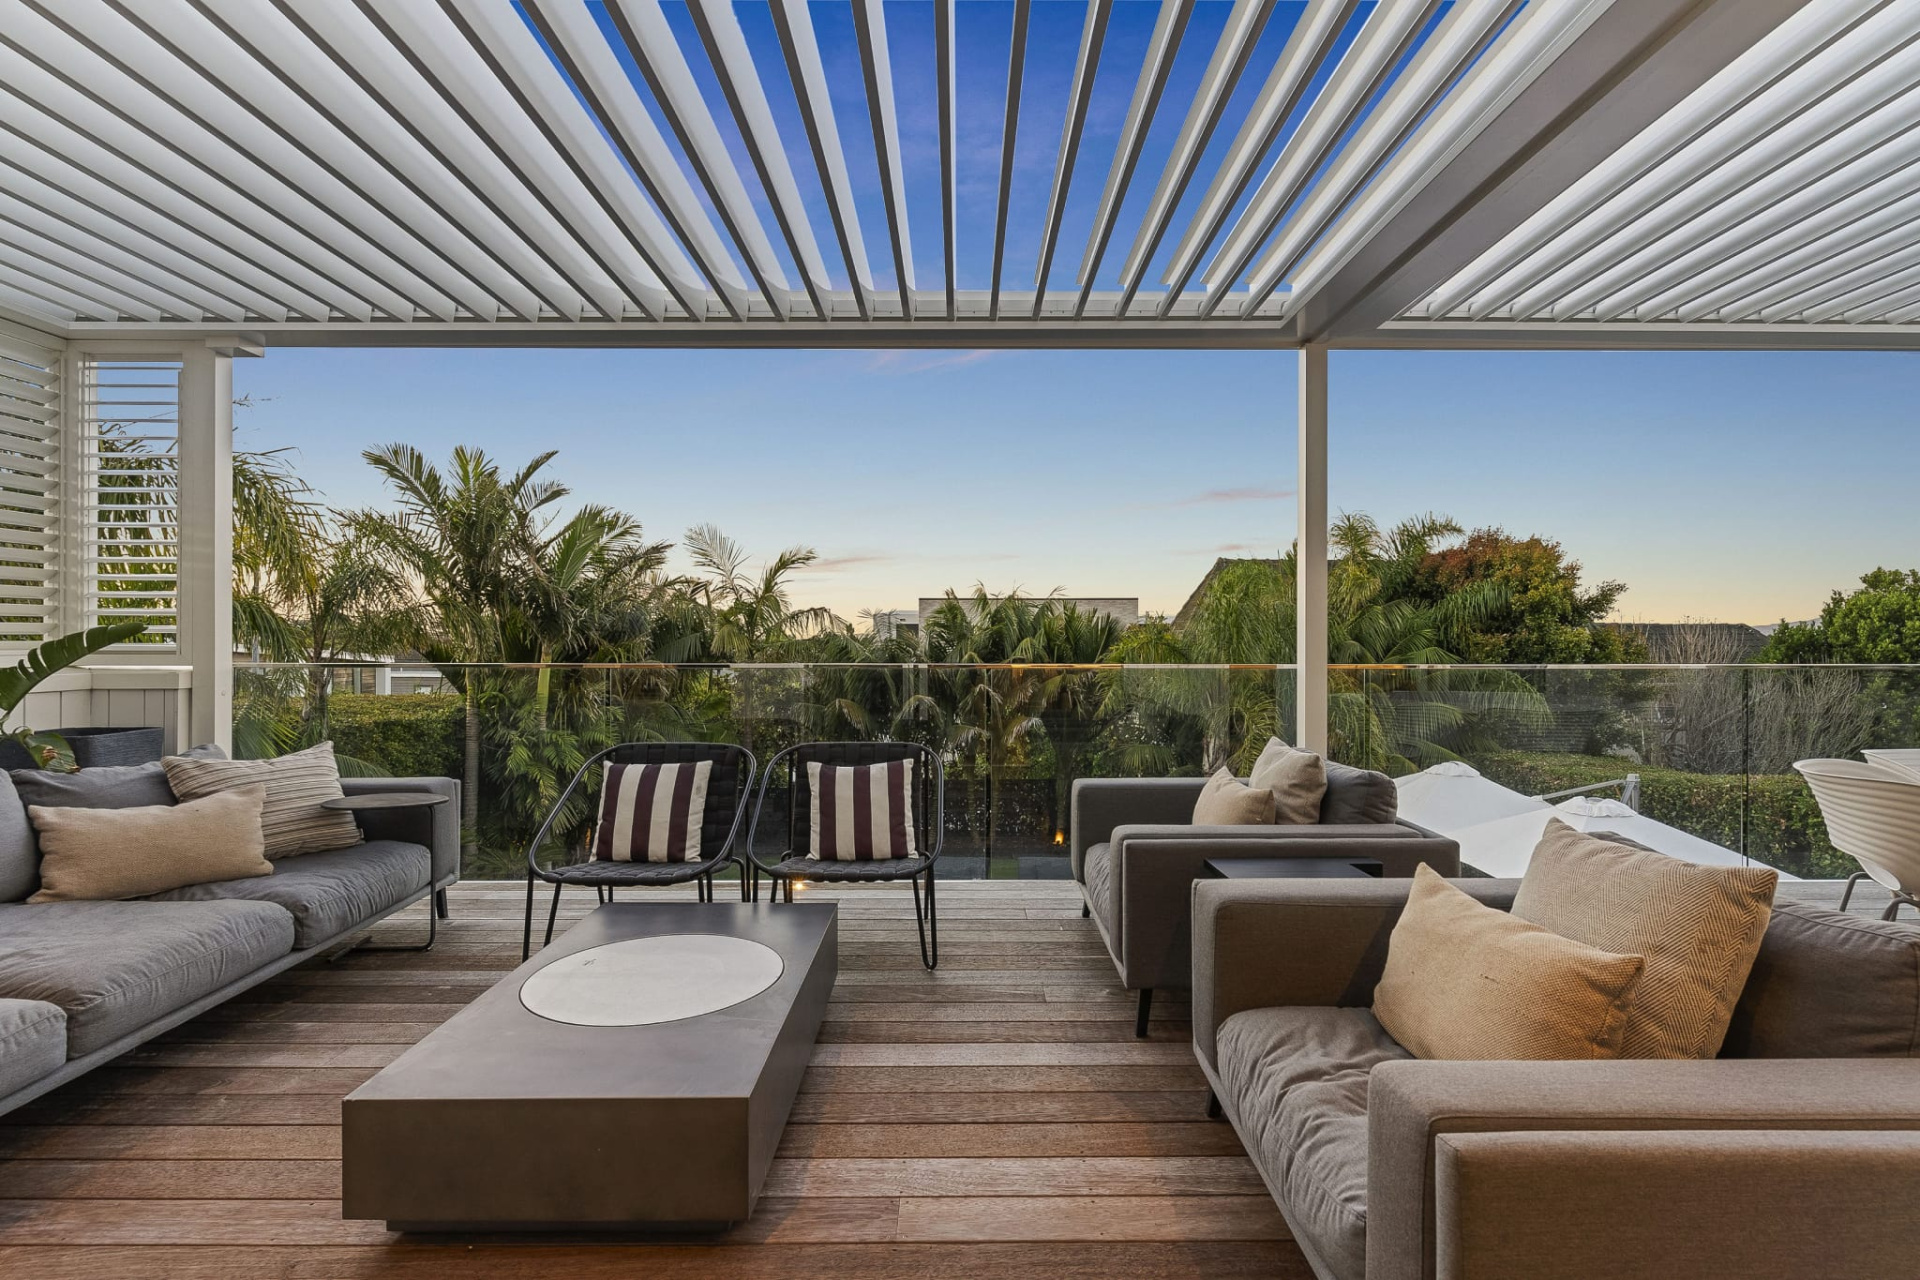
Louvre Roof Design Choices
Height
The height of your louvre roof does two things: it determines how the space feels to be in, and it sets the practical boundaries for everything that attaches to it.
A lower roof creates a more enclosed, intimate atmosphere. It's good for spaces where you want to feel sheltered and settled. A higher roof opens the space and lets more light in from the sides, but it can reduce the shade the blades provide as the sun moves across the sky.
There are usually practical constraints to work within, too. If the roof is wall-fixed, the height of your existing eaves, soffits, or door frames will influence where the structure can sit.
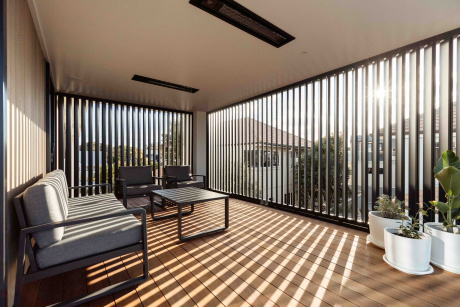
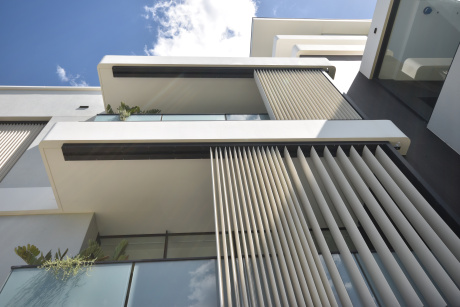
Blade Orientation
Whether your blades run parallel or perpendicular to the house affects both how the roof looks and how much control you have over light entering the interior.
Blades running parallel to the house are generally the better functional choice. They allow you to fine-tune how much direct light reaches the indoor living spaces behind the outdoor area, which matters more in summer when the sun is higher and more intense. They also tend to echo the horizontal lines of cladding and decking, which gives the finished structure a cleaner, more cohesive look.
Depending on the size of your roof, you may have the option of a single-bay or double-bay layout. A double bay introduces a mid-beam and offers greater flexibility in blade direction, which can be useful on larger or more complex sites.
Colour and Finish
Louvretec's opening roofs are available in Powdercoat, anodised, and wood grain finishes. The right choice depends as much on your home's architectural style as it does on personal preference.
Powdercoat gives you the widest colour range, from matt blacks and charcoals through to whites, creams, and warmer tones like copper. It sits on top of the aluminium as a smooth, baked-on finish and is the most popular choice for contemporary homes.
Anodised finishes work differently, where the colour becomes part of the aluminium itself through an electrochemical process, so you can still see and feel the texture of the metal underneath. The result is more organic and metallic in appearance, and it suits projects where a softer, more refined look is the goal.
Bronze and silver anodised are popular choices, particularly when paired with a contrasting powder-coated frame.
Wood grain finishes are worth knowing about, too, especially if you're working with a more traditional home. They give the aluminium the appearance of timber without the maintenance that comes with it.
When choosing a colour, think about what you're matching or contrasting with. Existing joinery, roofline colour, and cladding all come into play. And it's worth checking how your chosen colour looks in shade, not just in full sun. Outdoor structures spend much of their time in their own shadow.
Motorised or Manual?
When you plan a louvre roof, the right choice depends on how you'll use the space, not which one sounds more appealing.
Manual systems are operated by a winder and work well for smaller areas or for homeowners who prefer simplicity. They're reliable, require minimal maintenance, and don't depend on a power supply.
Motorised systems are operated by remote control or a wall switch and can be fitted with rain sensors that close the blades automatically when the weather moves in. If you have soft furnishings under the roof, or if you're often away from home, that automatic response is a practical feature rather than a luxury one.
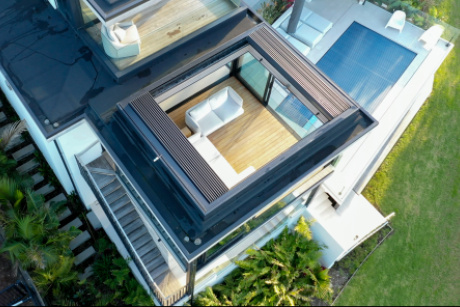
Louvretec's opening roof systems are built around the award-winning Spiral Pivot system. This operating mechanism rotates the louvre blades up to 180 degrees, with all moving parts and the motor kept completely out of sight. That concealed design isn't just aesthetic. It protects the drive system from the elements and keeps the finished structure looking clean from every angle, whether the blades are open, closed, or anywhere in between.
Our system is available in both motorised and hand-operable formats, so the choice of controls doesn't change what's driving the blades.
Opening or Retractable Roof?
A standard opening roof keeps the blades overhead at all times. They rotate up to 180 degrees, giving you full control over light, shade, and ventilation. The blades are always part of the space visually, which, for most projects, is exactly what you want.
A retractable roof goes one step further. When you want a completely open sky above you, the blades stack back to one end of the frame and get out of the way entirely. On a clear summer evening or a bright winter's day, that's a genuinely different experience. When the weather changes, they extend back into position and operate just like a standard opening roof.
The difference is in how much flexibility you want overhead.
Visualise a Louvre Roof on Your Home Before You Commit
One of the most common sources of uncertainty at the NZ open roof planning stage isn't the engineering or the consent process. It's simply not being able to picture what the finished structure will look like on your actual home.
Inspiration images are a useful starting point, but they can only take you so far. A roof that looks stunning on a modern concrete and cedar home in Queenstown will read very differently on a brick bungalow in Hamilton or a weatherboard bach on the Coromandel. The proportions, the colour palette, and the relationship between the structure and the existing roofline all change significantly from one home to the next.
So how do you get a clearer picture before committing?
Try the Louvretec Virtual Viewer first. It lets you see different roof-opening configurations and finishes in a home environment, so you can start narrowing down your preferences before you've had a single conversation with a dealer.
It won't replace that conversation, but it lets you visualise a louvre roof on your home, and it's a lot easier to articulate what you want when you've already seen a version of it on screen.
What You Need to Know About Building Consent for Louvre Roofs in NZ
For most residential louvre roof projects in New Zealand, the rules are reasonably straightforward.
As a starting point, for most opening roofs attached to your home at ground level and under 20m², they generally don't require a building consent. For most freestanding structures at ground level, they can reach up to 30m² before consent is typically triggered. If your louvre roof is on a floor level above ground, such as on a first-floor deck, consent is required regardless of size. Check directly with your council before you finalise plans.
These are general guidelines, not guarantees. Site coverage rules, your property's zoning, and your local council's specific requirements can all affect whether consent is needed. If you're close to a threshold or your site has any complexity, checking directly with your local council or a Licensed Building Practitioner before you finalise plans is the right move.
Where required, your Louvretec dealer can help you understand what's needed for your specific project. Getting this sorted at the planning stage rather than mid-build makes the whole process considerably smoother. And if you're thinking about a louvre roof before building work begins, getting clarity on consent early means it can be factored into your overall project timeline from the start.
Talk to Your Local Louvretec Dealer and Plan Your Louvre Roof Today
Louvre roof planning in NZ isn't complicated, but it does reward those who think it through before they build. Start with how you live, understand your site, make your design decisions in the right order, and get the right people involved early. Do those things, and the finished result is far more likely to be a space you actually use, instead of one that looks good in photos but doesn't quite work in practice.
Louvretec has been in the industry for nearly 30 years, working alongside homeowners, architects, and builders to design opening roof systems that suit the way New Zealanders actually live outside. With a nationwide dealer network, there's local support and expertise available wherever your project is based. Knowing how to choose a louvre roof that's right for your situation and the way you want to design your outdoor space in NZ is exactly what your local dealer is there to help with.
Find your nearest Louvretec dealer and start the conversation today. Or if you'd like to get a feel for the options first, head to the virtual viewer and see what's possible in your home before your first meeting.